07/08 2026
How to create a virtual 3D tour: step-by-step guide
Create a 360° virtual tour online in three steps: upload panoramas, add them to a tour, link scenes with hotspots, publish and embed. Free plan included.
Storing panoramas on the website Questions and Answers The best Sponsored Good article

15
A virtual 3D tour is a set of 360° panoramas linked together so a visitor can walk from one scene to the next, look around, and jump between rooms from a plan or a map. On TrueVirtualTours the whole process happens in the browser: you upload the panoramas, add them to a tour, place transition points, and publish. There is nothing to install and the hosting is included. This guide walks through every step, then covers the details that make a tour feel professional.
In short: 1) upload the spherical panoramas you want in the tour; 2) add each panorama to the tour from the "Add to 3D tour" link; 3) open the tour, order the scenes, pick the start panorama, set the transition points (hotspots), and publish.
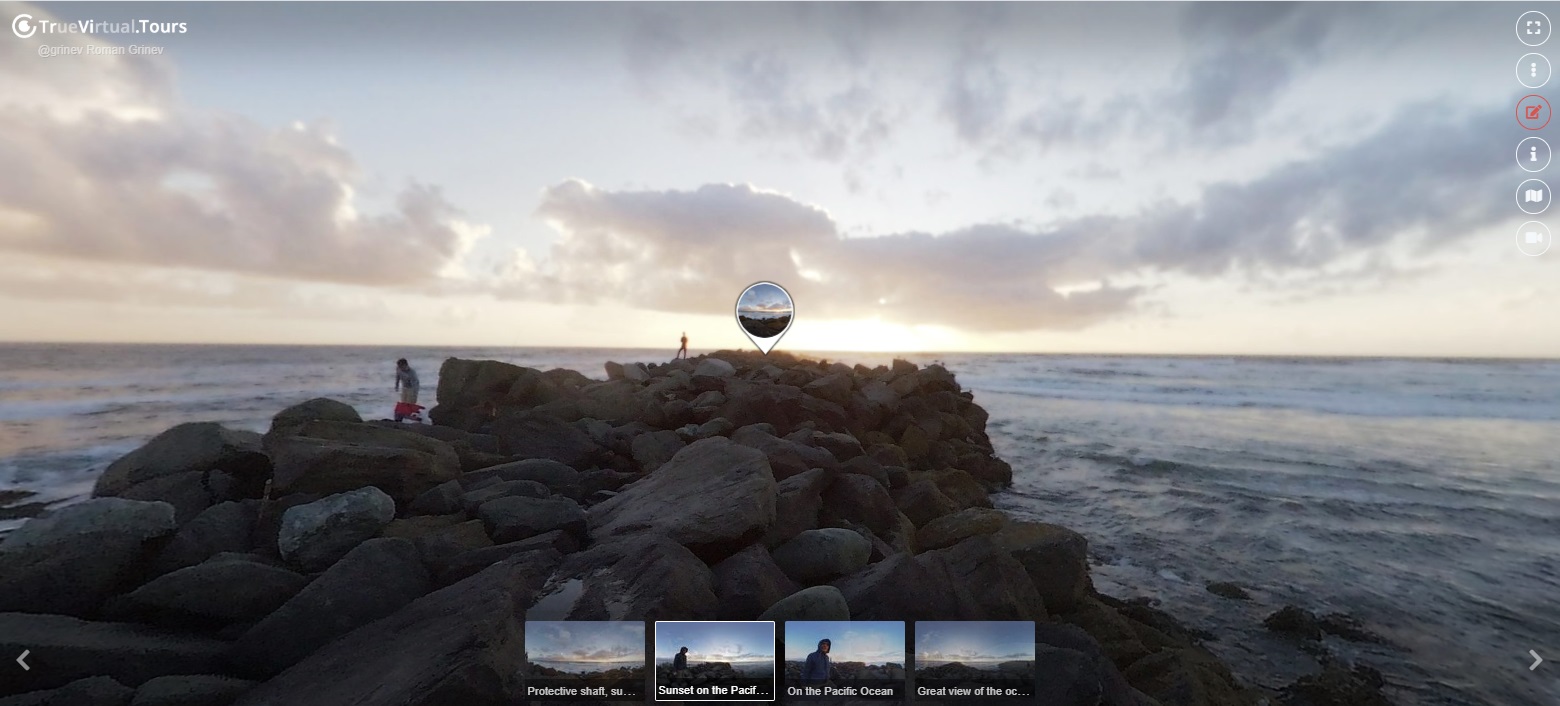
The screenshot shows a finished tour; you can open it here to see what the result looks like for a visitor.
What you need before you start
- Spherical panoramas. Equirectangular JPEG files with a 2:1 aspect ratio (360 x 180 degrees). The minimum is 2,000 x 1,000 pixels; the maximum is 65,500 x 32,750 pixels and 500 MB per file. Any 360° camera (Insta360, Ricoh Theta, GoPro Max, Kandao), a DSLR with a panoramic head, or a 3D renderer (3ds Max, Blender, V-Ray, Corona, Unreal) can produce them. If you are choosing a camera, see our 360 camera guide.
- A free account. The Free plan lets you upload 15 panoramas every 30 days and build as many tours from them as you like. Paid plans raise the limit and add maps, audio, 360° video and white-label embeds.
- A plan of the space (optional but useful). Knowing which room connects to which makes placing hotspots much faster.
Step 1. Upload your spherical panoramas
Click Upload panorama in the top menu, or go to Profile, Panoramas, Upload panorama. Drag in all the panoramas you plan to use in the tour; they upload in parallel and are converted into multi-resolution tiles, so even a 65,500-pixel image opens instantly on a phone.
After the upload, each panorama appears in the Published section, which means it is visible on your public page. For every panorama you can:
- give it a name and a description (visitors and search engines see both);
- place it on the world map so it shows on the map inside the tour;
- add tags, which help other users find your work;
- set the start view and, on paid plans, level the horizon, switch on autorotate and attach audio.
Tip: name the panoramas by room ("Living room", "Kitchen", "Terrace") right away. Those names become the scene labels in the tour and are much easier to work with than "IMG_4821".
Step 2. Add each panorama to the tour
Open Panoramas, Published (or whichever section holds the panoramas). Under each panorama there is an Add to 3D tour link. Click it and a dialog lists your existing tours.
If you do not have a tour yet, type a name for it in the search field. When no tour with that name exists, a Create 3D tour button appears; click it and the new tour is added to the list. Click the tour name to add the panorama to it.
Repeat this for every panorama that belongs in the tour. One panorama can be part of several tours, so you can build, for example, a full-building tour and separate per-floor tours from the same uploads.
Step 3. Edit the tour: order, start scene, hotspots
Go to Profile, Virtual tours, Drafts (new tours start as drafts). Open your tour; the full-screen mode is more comfortable for editing. Switch on editing with the red edit button. In this mode you can:
- Reorder the scenes. Drag the panoramas into the order a visitor would naturally walk. The order also defines the thumbnail strip at the bottom of the player.
- Choose the main panorama. This is the scene that opens first. Pick the most impressive view, usually the entrance or the best room, not the corridor.
- Place transition points (hotspots). In each scene, click where the next room is and choose which panorama it leads to. Hotspots keep the viewing direction, so when a visitor walks through a door they arrive facing the same way. Read the detailed guide on hotspots and tunnels between panoramas.
- Add info points (Start plan and up). Image, text or plate markers explain furniture, exhibits or facilities; Pro adds polygon markers that outline an exact shape.
- Add a floor plan or a map (Start plan and up). A floor-plan scene with the position of each panorama lets visitors jump between rooms from the plan. An OpenStreetMap scene does the same for outdoor tours.
When the tour is ready, open the tour properties dialog and tick published. The tour moves from Drafts to Published and becomes visible on your public page, in the gallery and to search engines. If the tour is for a client only, set it to unlisted instead (Start plan and up): it opens by direct link but is hidden from the gallery.
Step 4. Share, embed or send the link
Every published tour has its own page with a link, an Open Graph cover for social networks and a JSON-LD description for search engines. To put the tour on your own website, open the Share dialog and copy the iframe code:
<iframe width="100%" height="480" frameborder="0" allowfullscreen="true"
  src="https://truevirtualtours.com/tour/1234/show"></iframe>
Paste it into WordPress, Wix, Squarespace, Tilda, a property listing or plain HTML. The width accepts pixels or percentages. On the Start and Pro plans the embedded tour opens without the splash screen, and Pro can hide the logo and controls entirely. The full guide: how to embed a panorama or virtual tour on your website.
Tips for a tour that feels professional
- Shoot at eye level and keep the tripod height constant. Jumping heights between scenes is the most common reason a tour feels wrong.
- One panorama per room, two for large rooms. More scenes do not make a better tour; clear transitions do.
- Level the horizon before uploading, or use the horizon tool on a paid plan. A tilted horizon is visible in every scene.
- Set the start view of every scene to face the most interesting direction, not the wall behind the camera.
- Use info points sparingly. Three well-placed markers beat twenty.
- Add the location. Tours with coordinates appear on the map and get a GeoCoordinates block in the structured data.
- Write a real description. Two or three sentences about the place; it is what search engines show under the title.
Free plan or paid plan?
The Free plan is enough to build and publish a complete tour: 15 uploads per 30 days, files up to 500 MB, hotspots, VR and gyroscope, embedding on any site. Free panoramas stay online while your account is active, and we email you before anything is ever removed. Start ($10 a month, 10 GB of storage included) adds info points, floor plans and maps, audio, 360° video scenes, unlisted tours and embeds without the splash screen. Pro ($20 a month) adds the white-label player, post-processing and polygon info points. Details are on the pricing page; the overview of what the platform does is at virtual tour software.
Frequently asked questions
How long does it take to create a virtual tour?
For a 10-room flat with the panoramas already shot: about 20 minutes. Uploading takes a few minutes, adding panoramas to the tour a couple more, and placing hotspots about a minute per scene.
Can I make a virtual tour without a 360° camera?
Yes. A DSLR or mirrorless camera on a panoramic head, stitched in PTGui or Hugin, gives higher quality than most 360° cameras. Rendered panoramas from 3ds Max, Blender, Unreal or Twinmotion work the same way; see rules and stages of creating a virtual tour for the shooting side.
Can I edit the tour after publishing?
Yes. Replace a panorama, move a hotspot or rewrite a description at any time; the tour page and every embed update automatically.
Do I need my own hosting?
No. Panoramas, tiles, video and the player are served by TrueVirtualTours. You only share the link or paste the iframe.
Can visitors view the tour in VR?
Yes. One tap on the VR icon opens the tour in a headset or in split-screen mode on a phone; gyroscope control works on any modern phone browser.